• Home
  • Privacy Policy
  • Contact
    • Collaborate
  • Blog
  • Parties
    • Children’s Parties Ideas
    • Holiday Parties
    • Adult Party Ideas
  • Holiday Ideas
    • Christmas
    • Easter
    • Fourth of July
    • Spring
    • Thanksgiving
    • Valentine’s Day
  • Seasons
    • Winter
    • Spring
    • Summer
    • Autumn
  • Recipes
    • Appetizers
    • Beverages
    • Desserts
    • Main Dishes
    • Side Dishes
    • Soups
  • Project Gallery
    • Crafts
    • Decorating
    • DIY
    • Good Ideas
    • Tutorials
  • Shop My Home
  • Nav Social Menu

    • Bloglovin
    • Email
    • Facebook
    • Instagram
    • Pinterest
    • Twitter

At The Picket Fence with Vanessa Hunt

Where Ideas for your Home Meet Inspiration for your Heart

  • Book
  • Speaking
  • Meet Vanessa
    • Featured

November 19, 2012

How To Make an Antique Enamel Sign from Knick of Time Interiors


We are so thrilled to have Angie from Knick of Time Interiors with us today! She is one of our fabulous sponsors and we know you will love learning how to make your own Antique Enamel Sign.


My name is Angie and I blog at Knick of Time, and own an Etsy shop by the same name. Like so many of you, I love old, tattered, well-loved “stuff” so I talk about old stuff on my blog…a LOT. Today I came to share At the Picket Fence, something that looks old, but isn’t, and you can make it yourself – for under $1.


Remember when there were lots of blogs offering giveaways for the old style enamel signs by Ramsign?

Did you win one?

Drat…me either!

I even hosted a giveaway for Ramsign, but never did win any that I entered. If you search eBay and Etsy, there are also some antique enamel signs available. Can you afford them?

Drat…me either!

Long story short, I want an “antique enamel” sign, and have had it in my head to figure out a way to make one myself. It took me awhile to figure it out,  but I finally came up with my version and I must say, I kinda love it!


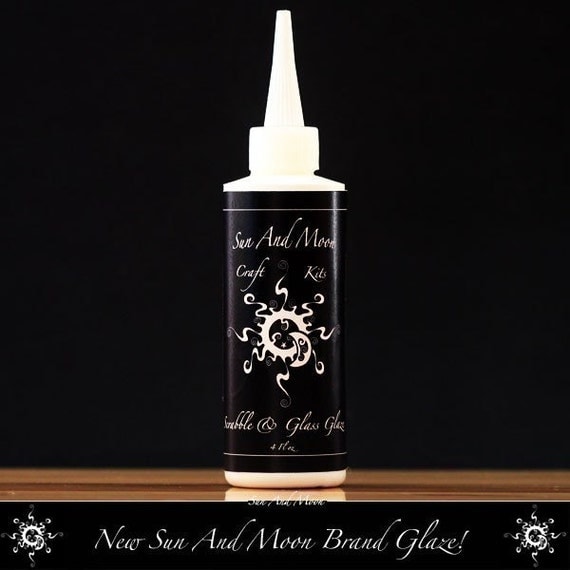
I knew I wasn’t going to be able to truly create an enamel sign, but I wanted it to look like enamel. Recently, I remembered I had a bottle of glass glaze that I purchased several years ago when making necklaces with Scrabble tiles.
I figured the glass glaze would give the strong, shiny surface, similar to enamel, so I went to Picmonkey to start designing my signs.
I chose this as my base image and removed the creepy skull graphic originally on it.


Then I started coming up with word variations for my sign.
I’ve included several for you at the bottom of the post to choose from.


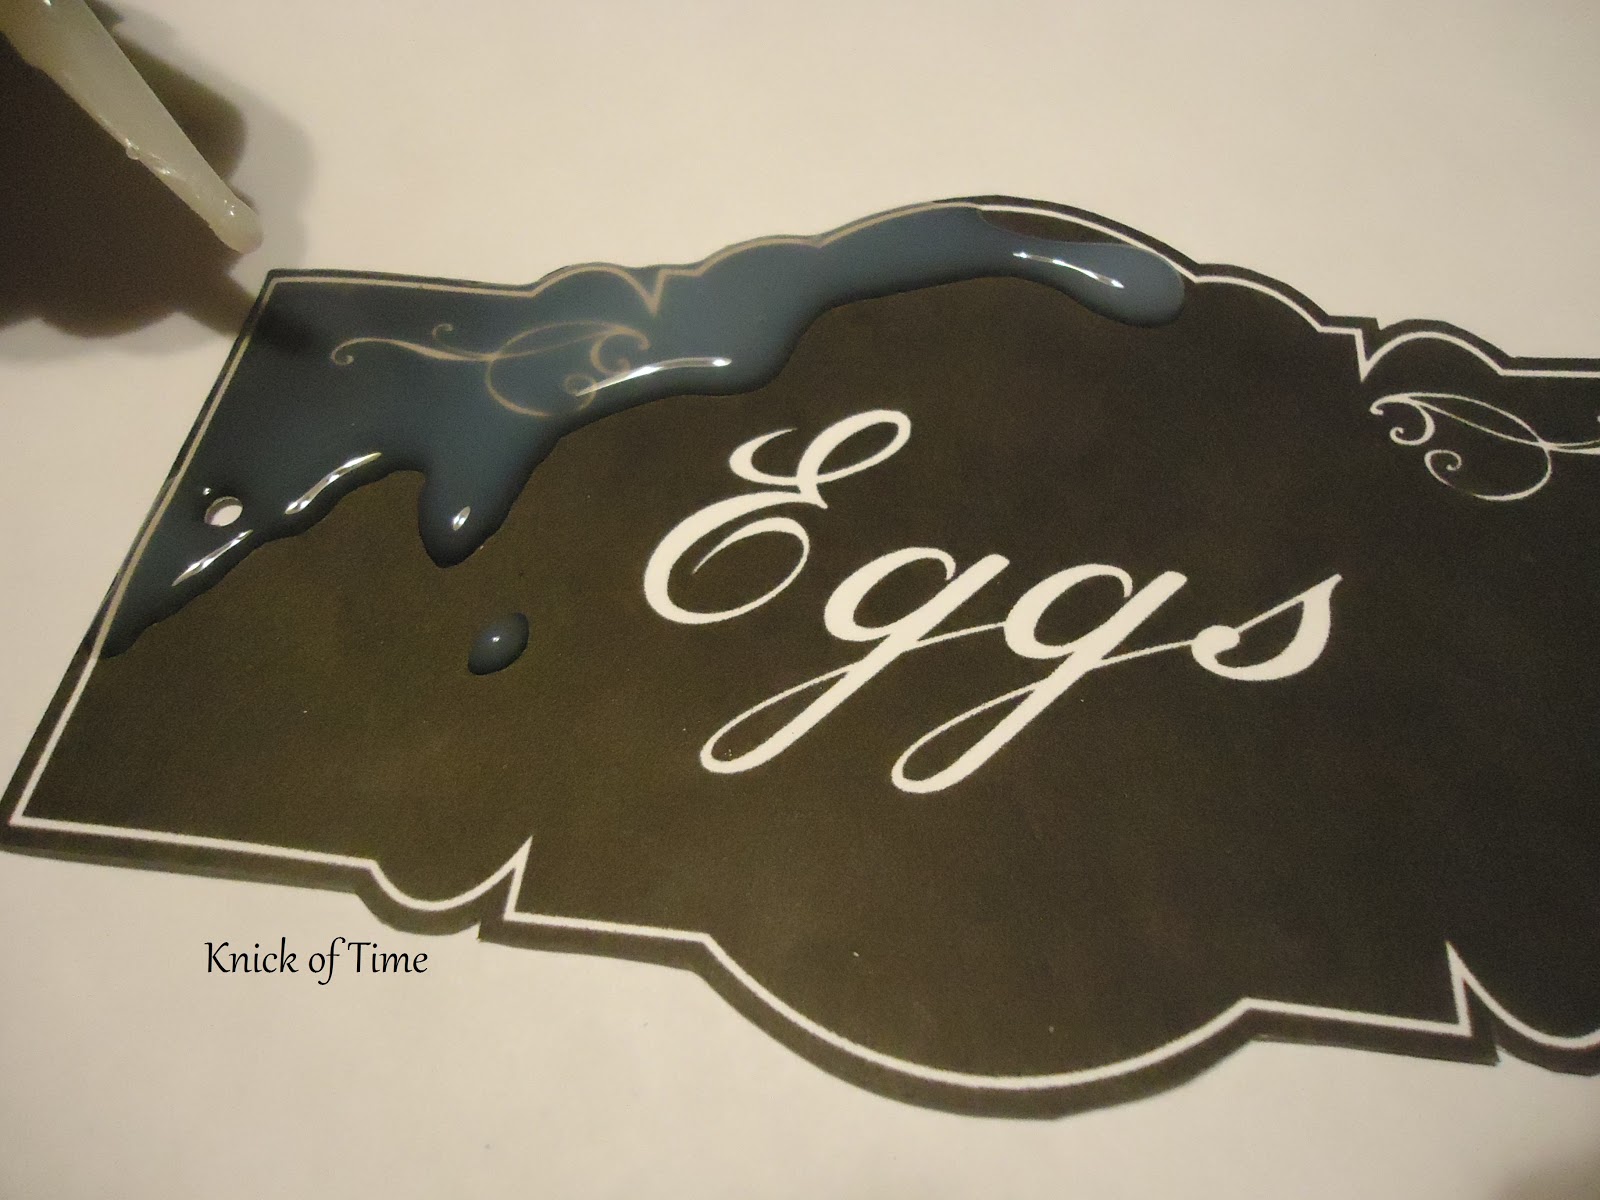
I printed out the “Eggs” one first, because I loved the way the lettering looked.  If you plan to try this project, you can save my base image to your computer,then go to Picmonkey to add your own lettering, or use one of several I’ve already created. You’ll also need scissors, a hole punch, and glass glaze.  I printed my image on cardstock so it would be stiff, then carefully cut it out. Don’t forget to punch a hole on each side if you plan to hang or mount it.
I purchased my glass glaze through an Etsy shop.
 Sun And Moon Glaze - For Glass Tile Pendants, Scrabble Tiles, Scrapbooking, Domino Jewelry, Bottle Caps etc.
(click on photo to go to shop)


Start squeezing on the glass glaze on your “sign”, without stopping and starting a lot – that creates air bubbles.Go easy on the glaze – a lighter coat than what you see here is better. Let dry in an undisturbed spot for about 24 hours.


So far, so good, right? Seriously, at this point in the project, I’ll admit I was loving how it looked and was patting myself on the back, seeing my dream of having an “antique enamel” sign come true.


 There are several reasons why I work on projects such as this in the middle of the night. One of those reasons is a 12 year old boy. I didn’t want to disturb it, so I left it sitting on the kitchen table to dry.

You can see where this is going, right? My son wakes me up later in the morning with, “Mom, we have a little problem.”

Short story – he bumped it, messed up the glaze and my genius of a project, now looked less than stellar.
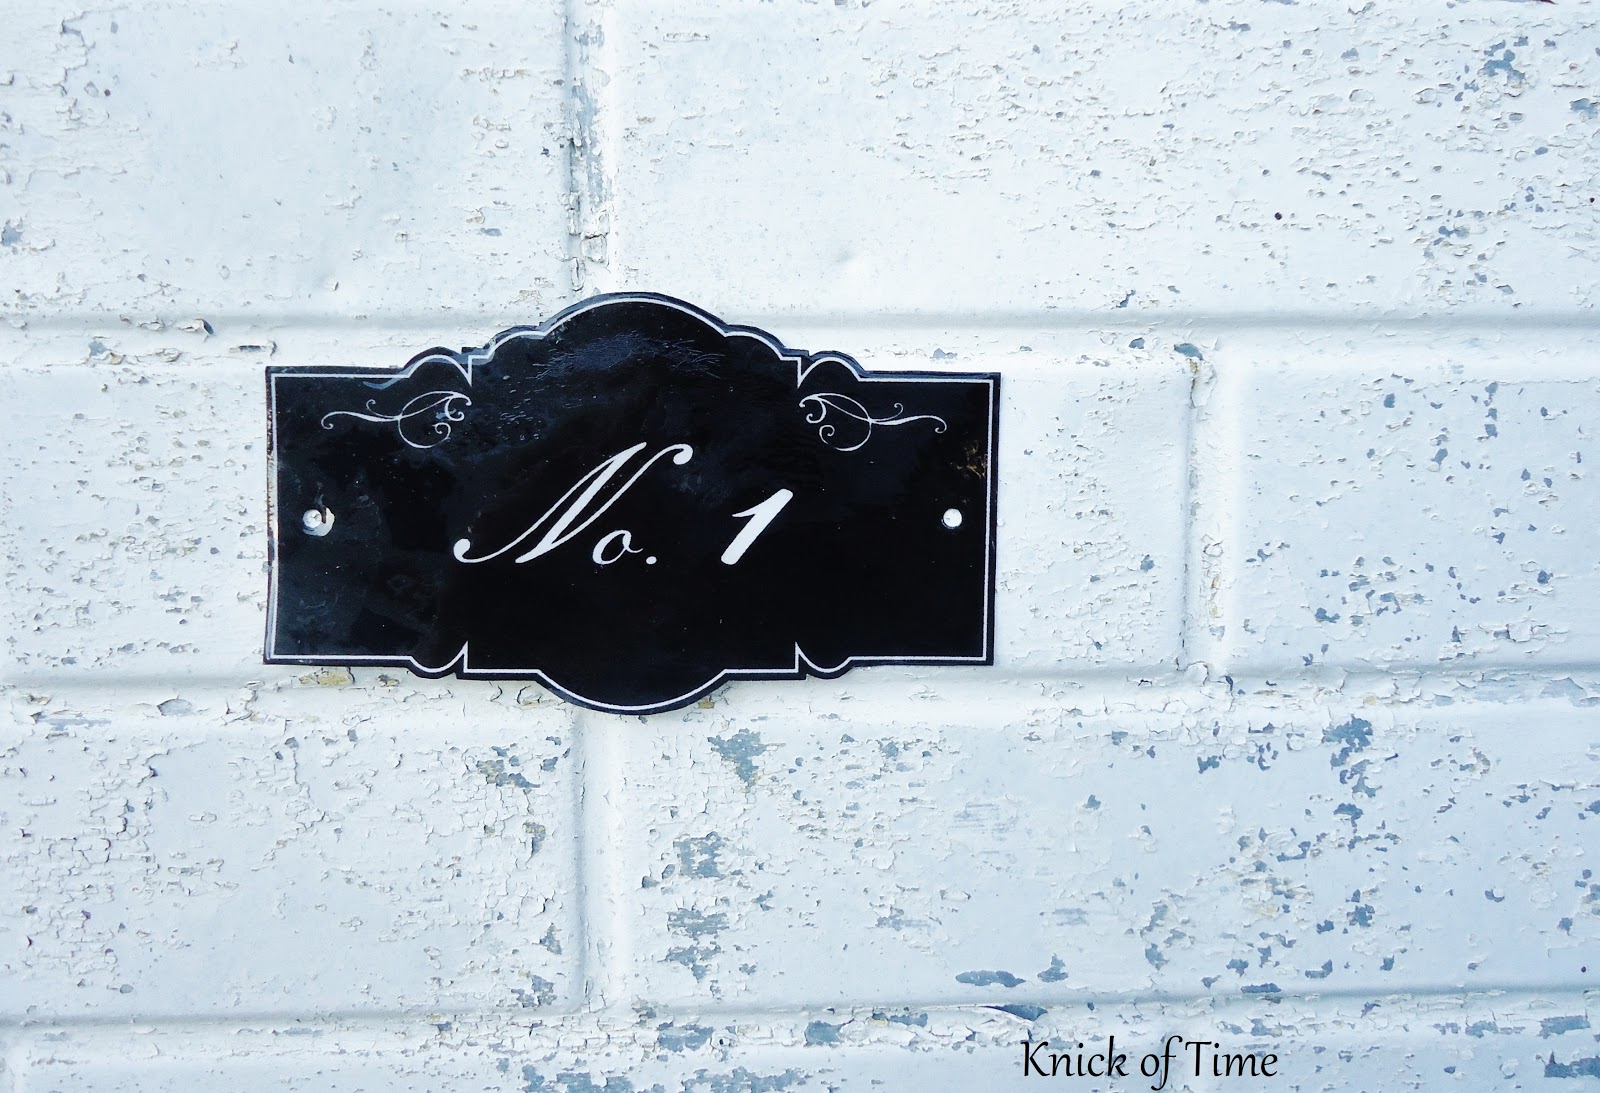
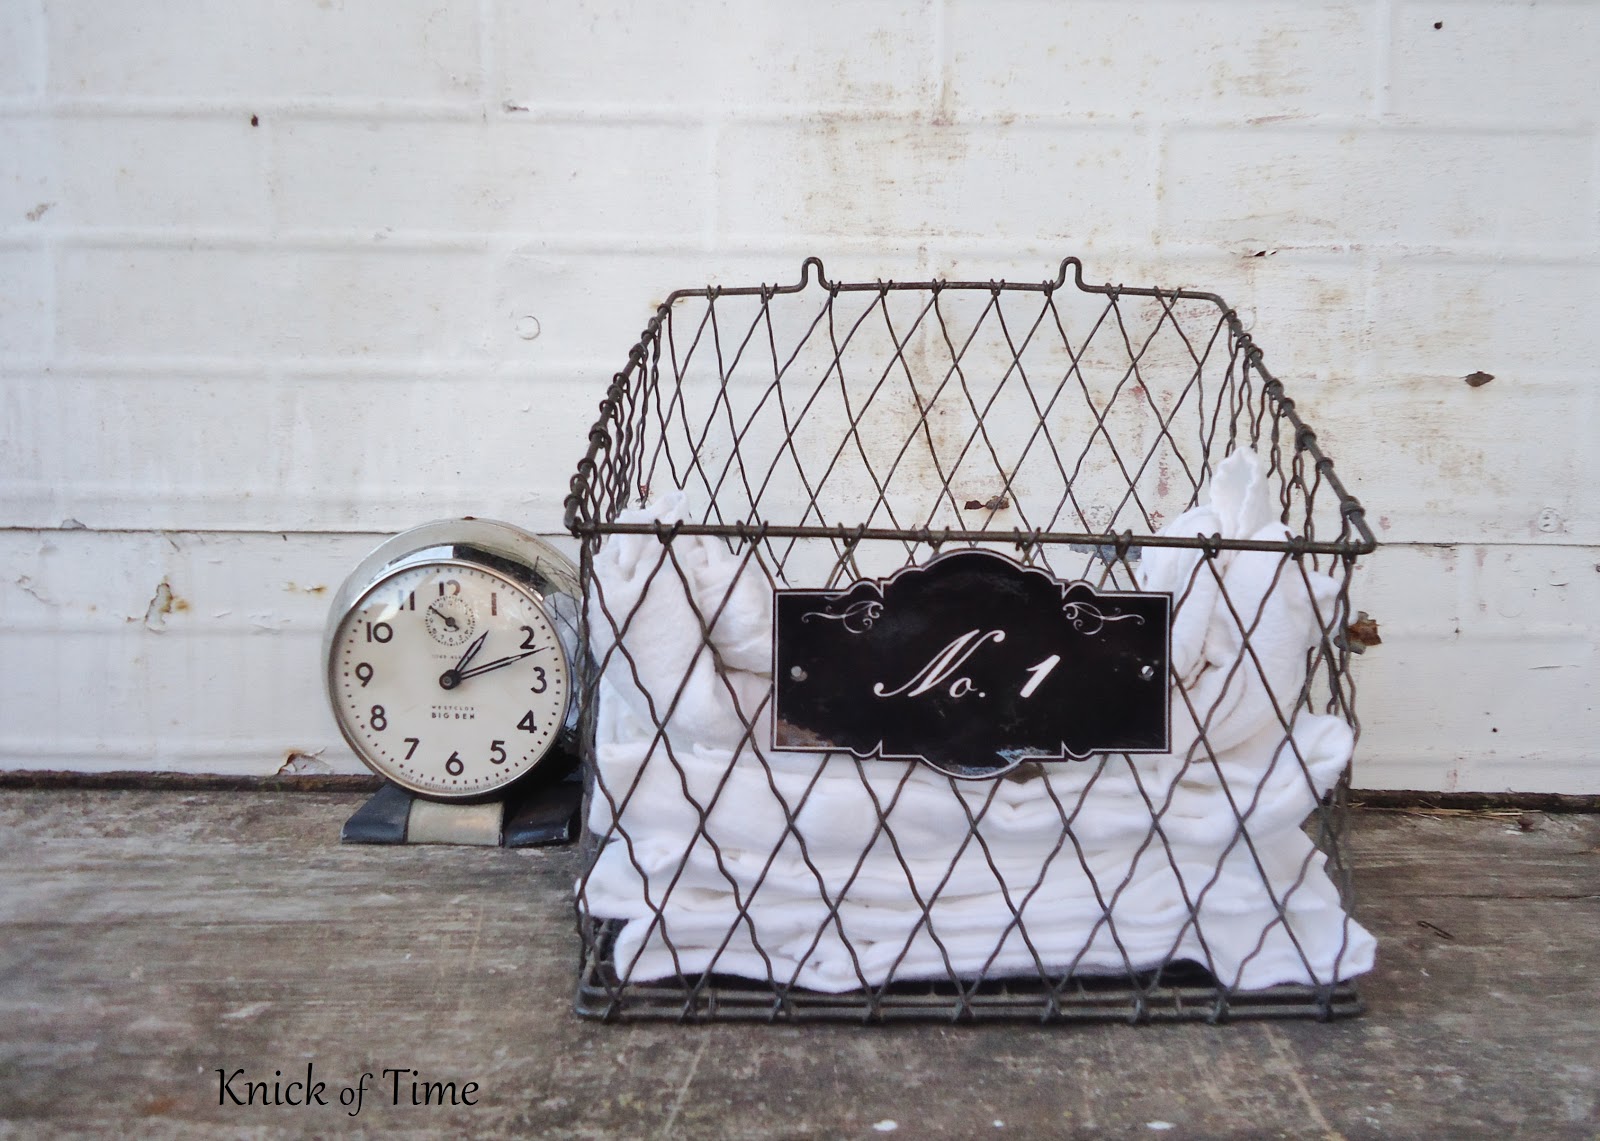
2nd time’s a charm, right?
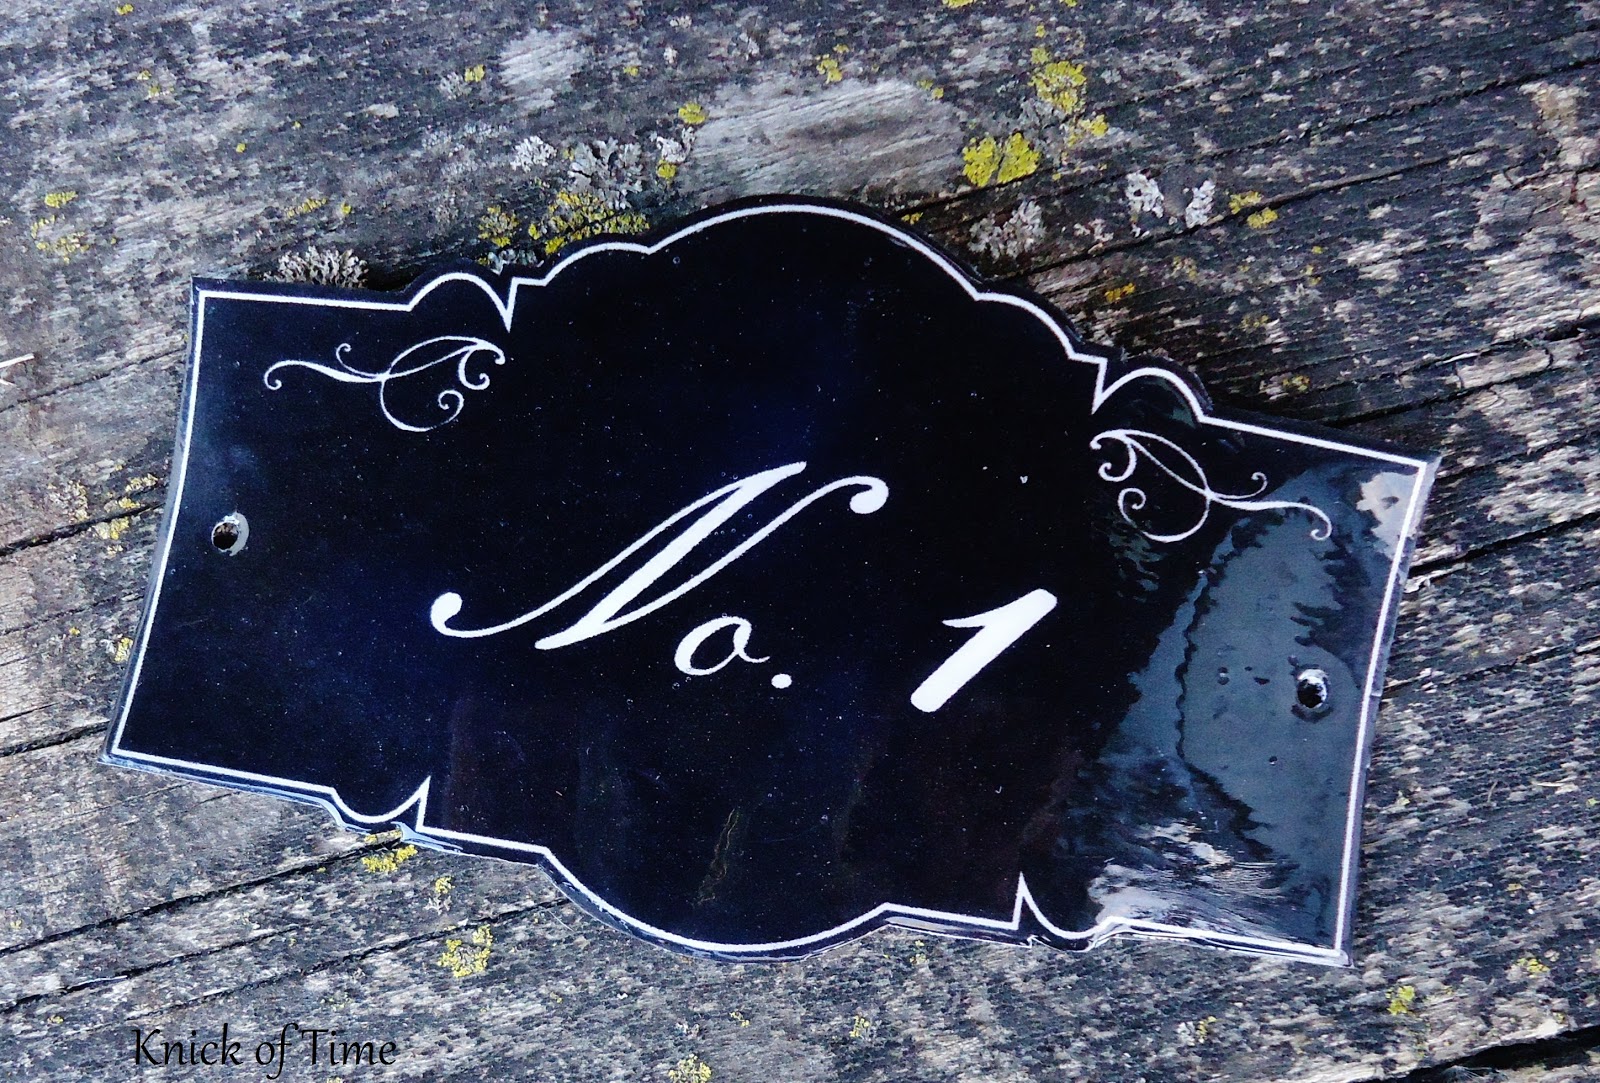
This time I printed out a No. 1 image and I printed it smaller, because I didn’t have a lot of glass glaze left in my bottle after using so much on the first one. This time I took it to my bedroom to dry. I kept checking on it all day and just wanted to wrap my arms around myself for a big hug…I was thrilled with the results I was seeing.


 These aren’t waterproof because the back side is still card stock paper, but I really wanted to use mine to embellish things inside the house.


The little white “flecks” you see that aren’t nearly that visible in real life.The camera picks them up as white spots. This is why you don’t want to stop and start a lot once you start squeezing the bottle. If you do get bubbles, use a sharp needle to pop them, but wait until you have covered the whole thing with glaze first.  My bubbles were really tiny, so I skipped popping them, but next time I would do it.


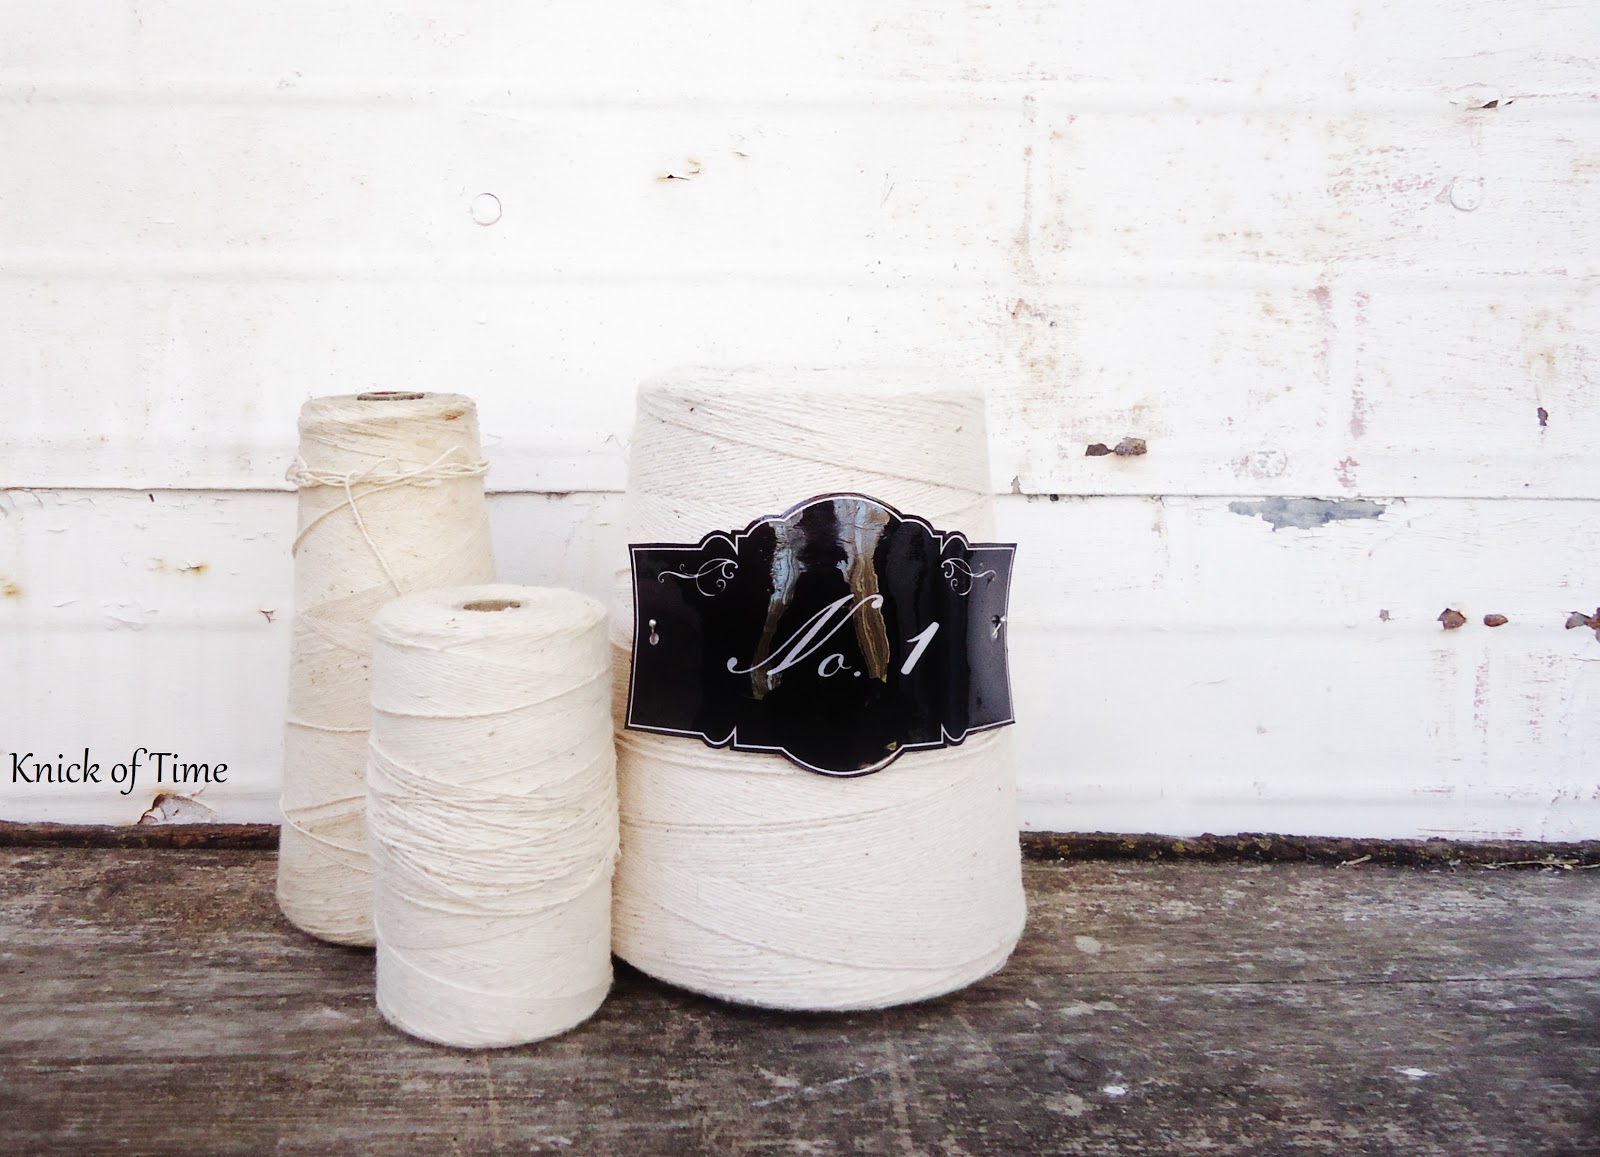
 What I love about my version is that it ends up being like flexible plastic, so I can mold them around rounded objects, like this spool of thread.


Here are some variations for you.


If you prefer to add your own words, or change the font style, just go to Picmonkey and use my base image up above, then add your own text. I hope you enjoyed this project. It’s very inexpensive and easy to do…as long as you protect it from 12 year old boys!
Please drop in and visit me at Knick of Time as well.
Knick of Time
I host a weekly, vintage theme link party called “Knick of Time Tuesday”. Every Wednesday, I also feature antique graphics on my blog that are free for you to use.

Throughout the week, I post lots of projects that make use of old stuff, and share our home remodeling journey as well.

 

If you have a passion for timeworn goods, come visit my shop – Knick of Time.


Enjoy a 15% discount using the code PICKETFENCE.
I really appreciate Heather and Vanessa allowing me to come share with you At the Picket Fence.
It’s been a true pleasure!
Blessings,
Angie

Thank you Angie for joining us today and sharing your amazing “enamel sign” project! We’re off to make some for ourselves. grin! Please take a moment to visit Angie on her lovely blog and at her shop chock full of so many fabulous vintage items…and as always thank YOU for visiting us At The Picket Fence!

15 Comments Filed Under: Crafts, DIY, Good Ideas, Guest Posts, Sponsors, Tutorials Tagged With: cheap crafts, enamel sign, tutorials

Subscribe

Get the latest goodness straight to your inbox!

Previous Post: « Pure Joy~Simply Sunday Thanksgiving Series
Next Post: Glitzy Thanksgiving Place Setting Menus…a fun last minute craft! »

Reader Interactions

Comments

  1. Carlene@Organized Clutter says

    November 19, 2012 at 4:10 AM

    Great idea Angie.

    Reply
  2. Debbie says

    November 19, 2012 at 4:25 AM

    Angie, that’s such a clever idea! I’ve had a jar of epoxy sitting around forever. Do you think that would work? I’ve never used either one (glass glaze or epoxy). Very very cute! I’m off to visit your blog!

    Debbie

    Reply
  3. Angelina says

    November 19, 2012 at 8:50 AM

    Oh, I love everything about this project and the possibilities are really endless. Thank you so much for sharing it with us, as well as the labels for printing. I can’t wait to give this a try.
    Have a Blessed Day!
    Angelina

    Reply
  4. Martina says

    November 19, 2012 at 9:09 AM

    What a great idea!! Love the signs! Heading on over to visit her Etsy shop!

    Reply
  5. Leslie Stewart says

    November 19, 2012 at 10:17 AM

    Such a great idea! Thanks so much for sharing! The labels are great!

    Reply
  6. Becca says

    November 19, 2012 at 10:27 AM

    What an awesome idea, Angie! Thanks so much for sharing your creativity!

    Reply
  7. karen says

    November 19, 2012 at 5:32 PM

    Angie this is genius! I love it. Thank you so much for sharing such a really cool project!

    Reply
  8. Shirley@Housepitality Designs says

    November 19, 2012 at 8:44 PM

    Fantastic, fantastic signs!…Such a wonderful creation that is so much more versatile than the metal signs…love how you can bend it around an object!…Truly creative Angie!!

    Reply
  9. Doreen@HymnsandVerses says

    November 19, 2012 at 8:52 PM

    Wow – that is amazing! I actually DID win a Ramsign giveaway and love my real enamel sign, but can’t wait to try this out! Great way to get the look for WAY less! Thanks for sharing!

    Blessings,

    Doreen

    Reply
  10. Anna says

    November 19, 2012 at 10:59 PM

    I love this idea! I’ve been wanting to change our address plate for a long time now, so I’ll have to use this idea and come up with a waterproof version. 🙂

    Anna
    askannamoseley.com

    Reply
  11. Suzanne says

    November 20, 2012 at 8:18 AM

    Thank you soooo much for this tutorial! I love it, and am already planning to make several.

    Reply
  12. Jenny says

    November 20, 2012 at 11:02 AM

    This is awesome! Thank you so much for letting us use your designs too! I can’t wait to make some!

    Reply
  13. JP says

    November 20, 2012 at 3:41 PM

    Great feature…thank you for sharing..gonna go pin it!

    Reply
  14. bj says

    November 23, 2012 at 4:39 AM

    How awesome is THIS !! wOW, I can’t wait to try it. You sure did a good job….and thanks so much for sharing your great images with us.

    and, I DID win a Ramsign….it’s on it’s way to me as we speak….:)
    xo bj

    Reply
  15. pijeer says

    April 11, 2013 at 12:22 AM

    I collect enamel signs all my life, I prefer the old and valuable inscriptions many years old, but sometimes can not resist and order some new enameled sign, mostly from https://www.smalt.com/, but there are auctions where such inscriptions sell.

    Reply

Leave a Reply Cancel reply

Your email address will not be published. Required fields are marked *

Primary Sidebar

Search This Blog

Get the book!

Invite Vanessa to speak at your event!

Stay updated!

  • Nostalgia is Not an Aesthetic

    Nostalgia is Not an Aesthetic
  • A New Podcast

    A New Podcast
  • Taking Decorating Thoughts Captive

    Taking Decorating Thoughts Captive
  • Kids Need Real Answers

    Kids Need Real Answers

Sign Up and Never Miss A Post!

Must Reads

Latest Recipes

Making the Case for Heirlooms

Strawberry Muffins with Lemon Glaze

Honey Tea Cake Loaf with Lemon Glaze

view more recent recipes

Recent Posts

  • Nostalgia is Not an Aesthetic March 21, 2026
  • A New Podcast March 21, 2026
  • An Autumn Home Tour October 9, 2025
  • How to Adapt Your Traditions as Your Kids Get Older December 13, 2024
  • Christmas Home Tour 2024 December 13, 2024

Footer

Stay Connected!

Instagram

Front door wreath….✔️ The very last Christmas dec Front door wreath….✔️

The very last Christmas decorating to be completed and one of the most important since there’s nothing I love more than welcoming people into our home this season.

I bought the wreath for $15 from a wonderful local vendor, reused my favorite bells and added a velvet bow in the color I’m carrying throughout the house this year.

Do you buy a fresh wreath each year or do you use a faux wreath on your front door? 

#frontdoorwreath #christmaswreath #christmasporch
The first day of December and the first Sunday of The first day of December and the first Sunday of advent. As we enter into a month that can be filled with stress, anxiety, worry and even sadness, let us turn our hearts towards the ONE who came as the ultimate, undeserved gift. Because it’s all about Him. 

“Who can add to Christmas? The perfect motive is that God so loved the world. The perfect gift is that He gave His only Son. The only requirement is to believe in Him. The reward of faith is that you shall have everlasting life.” (Corrie Ten Boom)
“I would maintain that thanks are the highest form “I would maintain that thanks are the highest form of thought, and that gratitude is happiness doubled by wonder.” ~ G.K. Chesterton

Happy Thanksgiving to you and yours dear friends! 🍂
Its that time of year again. I share this recipe e Its that time of year again. I share this recipe every November because it’s JUST.THAT.GOOD! 

And I have a confession ...I’d rather have cranberry sauce smothering the turkey on my plate than gravy any day!! And this, this right here? Well it’s the best (and easiest!) cranberry sauce ever!! I eat on crackers and sandwiches and sometimes just by the spoonful. It’s so yummy! And I’m just so very thankful for all of you that I’m going to leave the recipe right here instead of making you go to the blog to get it. I promise you won’t regret having this on your Thanksgiving menu but be warned...you may find yourself up in the middle of the night sneaking some helpings of this deliciousness. Or maybe that’s just me!

Ingredients:
2 pounds fresh or frozen cranberries
2 oranges
2 cups granulated sugar
1 cup white wine.

Instructions:
Wash and pick over berries, removing any that are soft. Peel and dice oranges removing any seeds. Combine all ingredients in a large pot. Bring to a full boil. Reduce heat and continue cooking until cranberries pop open and mixture is thickening.
For best flavor, prepare and let stand for several days before using.

Gobble, gobble!! 🦃
It’s that time of year again!! Chex Mix will be ma It’s that time of year again!! Chex Mix will be made on repeat for the next month and I’ve figured out the secret to getting the BEST flavor.

Want to know what it is? It’s all about being EXTRA! 

Take the base recipe up a notch by using a full stick of butter, extra tablespoon of Worcestershire sauce and an extra 1/2 tablespoon of Lawry’s seasoning salt.

I guarantee you’ll never go back!

You’re welcome. 😉🎄

#chexmix #chexmixupgrade
Happy Friday!! I limped my way to the end of the w Happy Friday!! I limped my way to the end of the week and I’m feeling especially grateful for the twinkling lights around my home which give me so much joy.

The great debate on social media over whether or not Christmas decorations should appear before Thanksgiving is one I just let roll on past me. Because I am so unbelievably thankful for this life, my family, my friends, this country, this home and most of all my Savior. 

Having my home all ready to welcome the next sacred season doesn’t take away one iota from my ability to express gratitude on the official day set aside each year where we do that collectively.

And when the last slice of turkey has been eaten and all of the leftovers put away, I’ll be over here ready to be fully present in the month of December and soak up every bit of it! 🦃🎄
IKEA vs Heirlooms: Why we need family treasures “ IKEA vs Heirlooms: Why we need family treasures

“My children have grown up seeing antique books on a coffee table, vintage toys in their bedrooms and even pieces of furniture that were all passed down from one generation to the next. But as my nest gets closer and closer to being empty, I’m keenly aware of the fact that many of these cherished items might not be as welcome in the homes of future generations.”

*Read the rest over at @cleartruthmedia*
All of my CTM articles are saved in my highlights
Not too long ago, someone told me that they liked Not too long ago, someone told me that they liked it better when I just talked about decorating and didn’t mention anything else. This person preferred me to keep any opinions or convictions to myself and just focus only on content about home decor, crafts and recipes. Aside from the fact that I’m always astonished that people feel so free to say things like that, I do agree that it would be a lot easier and more palatable if I didn’t talk about things like a Biblical Worldview, apologetics and the nature of reality itself. For one thing, Instagram wouldn’t throttle my account with its algorithms that are skewed to diminish voices like mine. It would be much easier to be so tethered to this app that I change everything I post to fit into its preferred framework. I would be asked to be part of influencer groups and activities like I was years ago. But I’m not that person anymore. Yes, the core of this community will always be an emphasis on homemaking which will include decorating and recipes but I can’t separate that from the core of who I am as a follower of Jesus Christ.

It would be so much easier for me to just show you the latest Amazon products I’ve bought and tell you to “comment” to get the links. But I’m not called to take the easy path. Matthew 7:13-14 says, “Enter by the narrow gate. For the gate is wide and the way is easy that leads to destruction, and those who enter by it are many.”

I truly believe that so many have been lulled into thinking that the narrow gate wasn’t really all that narrow. But, it’s never been more obvious that it really is. And every day I seek to stay on that very narrow way.  More than ever before, I believe that our world needs to know that there is objective truth and a solid foundation to stand upon as we navigate our lives. My role as a homemaker is predicated on that foundation and everything else flows out of it. Talking about these things isn’t going to get me lots of views here. 

But I live for an audience of ONE.
The first time we hosted my in-laws for a meal was The first time we hosted my in-laws for a meal was in 1998. I was a new bride and eager to impress them. It did not go well. Let’s just say there was a bit of a garbage disposal mishap. 

It’s been over 25 years since then and I’ve learned so much about what really matters when it comes to hosting and caring for my family well during the holiday season. 

The peace we long for in our home begins with our hearts. If you want your home to feel more peaceful during the upcoming holiday season, I have five things to consider that will make that not only possible but predictable.

✨ Read the full article over at @club31women ✨

#club31women #wearethehomemakers
Here, in my little corner of social media, you won Here, in my little corner of social media, you won’t find a lot of unboxing of brand new items for Christmas. 

What I’m unboxing are the decorations in the attic that  I’ve had for years and figuring out how to give them a fresh look. I added new lights to an old pre-lit tree that no longer worked because I couldn’t bring myself to get rid of it. I’m putting out a different set of mugs at the hot cocoa station and the advent candles are arranged with greenery from outside.

As our feeds are filled with so.much.stuff, I want to offer you a reprieve. A place where you will find less emphasis on what’s happening in our homes and more on what’s happening in our hearts.

More than ever before, I can see just how much people are needing the hope found in Christ and that will always be the focus here. 

So, while you may not see me unpacking a massive, new tree or telling you to “comment for the link”, what you will see is encouragement to turn our hearts to what matters the most and let that reflect in every corner of our homes this season and all year long. 🌲

#wearethehomemakers #homemaking #homemakerschristmas #club31women
Follow
Privacy Policy

Copyright © 2026 · Divine theme by Restored 316

Copyright © 2026 At The Picket Fence